May 31, 2010

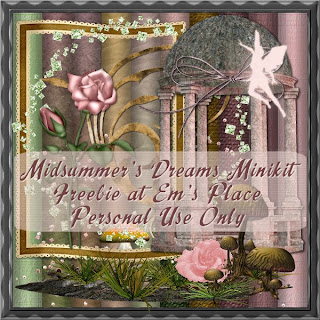
Midsummer's Dreams - Minikit


As a CT member for Heartbeatz Creations, I decided to contribute to their Midsummer's Dreams Collab kit by offering you a freebie minikit following their theme and color scheme. You can download it here.  Enjoy!

Don't forget to stop by Heartbeatz Creations Store to check out the collab kit which is comprised of the work of 15 designers from the store. The kits are tagger sized and they all can be yours free with a minimum purchase. It's a BEAUTIFUL collab and GREAT deal!

Em

May 20, 2010

Fallen Into Darkness


Fallen Into Darkness

This tut was written by me, Em Jay, on 5-19-10 with all rights reserved.  Please do not copy and paste it in any group, any website, or call it your own. You can link to it using a text link to my blog.

This tut is written using a PTU kit created by Angel’s Designs called Broken Halo which can be purchased here at Underground Scraps.   It was written using PSPX, but is adaptable to any version and is for people with a good working knowledge of PSP.

Supplies

Artmama Mask 10 which can be downloaded here.

I used the artwork © Bez Boardman. Please do not use her artwork unless you have permission to do so.  Feel free to use a tube of your choice.

Open new image 550 by 550, fill with white. Add new raster layer, select all, c/p BH_Paper6 into selection. Add ArtmamaMask 10, merge group. C/P BH_Mesh as a new layer, change blend mode to Burn. C/P BH_GlitterSpill1 as a new layer and drag it below the mask layer.

C/P the focus tube you choose to use as a new layer and position it where you want it.  C/P BH_RedWings as a new layer and drag it below the focus tube.  Resize, rotate and position the wings with the deform tool. Highlight the focus tube layer and merge down.  Add a drop shadow.

C/P BH_WordArt1 as a new layer. Position, resize and rotate it with the deform tool. Open BH_PentagramWChain and resize to 25%. Position it to look like it’s hanging from the left side of the wordart. You may have to erase some of the top part of the chain to make it show like you want it.  Duplicate twice and position these two chains the same way. Highlight the WordArt layer and merge down 3 times.

Open BH_SkullBook and resize to 60%. C/P as a new layer and move it to the bottom right of the image, rotating it slightly to the left with the deform tool.  Open BH_Skull1, resize to 30%. C/P it as a new layer, postiion, rotate and resize if needed to fit on the page of the book.  Once you have it how you want it, change the blend mode to Overlay and reduce the opacity to 50. Open BH_Bottle1, resize to 20%, c/p as new layer and position it by the book, drag the layer below the book layer. Open BH_Potion, resize to 60%, c/p as a new layer and position it on the bottom of the book somewhere. Open BH_Lamp1, resize to 50%, c/p it somewhere on the bottom of the tag and use the deform tool to rotate it a little to the left. Open BH_Lamp2, resize to 30%, c/p it as a new layer and position it on the bottom of the tag somewhere. Add a drop shadow to each one of the element layers.

Open BH_Candle1, resize to 20%.  Open BH_Candle2, resize to 15%. Open BH_Clothsack, resize to 40%.  C/P all three of these elements as new layers and position them where you want them.  Add a drop shadow to each layer.  Open BH_Bead 1, 4, and 5. Resize them all to 30%.  C/P them as new layers near the bag, duplicating the layers to add as many more beads as you like.  Resize and rotate then using the deform tool.  Once you have them all where you want them, highlight the top bead layer and merge down as many times to get them all on one layer. Adjust/sharpen once and add a drop shadow.  C/P BH_BrokenHeart4 as a new layer and position it on the right top of the tag, rotating a little bit to the left.  Add a drop shadow. 

Now you can add your text. The font I used is called DivineRight.  Add your watermark and copyright information.  You’re done!

Hope you enjoyed this tut.


May 13, 2010

At the Pond


At the Pond

This tut was written by me, Em Jay, on 5-13-10 with all rights reserved.  Please do not copy and paste it in any group, any website, or call it your own. You can link to it using a text link to my blog.

This tut is written using a PTU kit created by Ariasparkle called Fairy Bee which can be purchased here at Wilma4Ever Store.   It was written using PSPX, but is adaptable to any version and is for people with a good working knowledge of PSP.

No outside supplies needed.

For my focus tubes I used the two cookie posers included in the kit.  They are ©Ariasparkle.

If you find a scrap kit you really like to use on your tags and it only comes in full size, don’t shy away from buying it.  As long as the kit is 300dpi, it will size down nicely.  So, the first thing I did was resize the whole kit.  I resized everything down to 25%.

Open an image 550 by 550 and fill with white, c/p sk12-20 as new layer. Taking the magic wand, click inside the frame, selection/modify/expand 4, add new raster layer and c/p sk12paper3 into selection, select none.  Drag this paper layer below the frame.  Open the yellow button, sk12-9 and resize to 20%, sharpen twice, select none. C/P as a new layer over the scallops of the frame as shown in the sample image, duplicating the button as you go.  Once you have them all in place, close the bottom white layer and merge visible.

C/P sk12-4 as a new layer at the bottom of the frame, overlapping it a little on both sides and the bottom as shown, sharpen.  Duplicate this layer and using the deform tool position it up and to the right inside the frame, resizing it down to about half it’s original size, drag the layer below the main pond layer.  Highlighting the top pond layer, merge down.

C/P as new layers both cookie posers, resizing as needed with the deform tool.  After you have them placed where you want them, add a drop shadow to each one.

C/P sk12-17 as a new layer and position it up in the left corner of the tag, add drop shadow. Drag this layer below the pond layer. Add another yellow button to the center of the bow.

Open sk12-13 and resize to 25%. C/P as a new layer and move it over the center of the fern leaves on the bottom of the pond, add a drop shadow.  Duplicate as many of these little yellow flowers as you want and position them in little clusters over the fern.

Add your text and position and rotate slightly to the left using the deform tool. Drag the text layer below the pond layer, add a drop shadow.  Now you can add your watermark and copyright information, export as a jpeg and you’re done.

Hope you enjoyed this very easy tutorial that looks so cool!


May 11, 2010

Decadent Nights


Decadent Nights

This tut was written by me, Em Jay, on 5-11-10 with all rights reserved.  Please do not copy and paste it in any group or call it your own. You can link to it using a text link to my blog.

This tut is written using the  PTU kit created by Mystic Creations  called Decadent Nights which can be purchased at Heartbeatz Store.   It was written using PSPX, but is adaptable to any version and is for people with a good working knowledge of PSP.

No additional supplies needed.

Open a new image 550 by 550, fill with white. Set one vertical guide at 25, set horizontal guides at 150, 250, 350, and 450. C/P as a new layer Flower_Doodle02, rotate left 90, duplicate 3 times. Move the first doodle to the guide at 150, second doodle to guide 250, third doodle to guide 350, and fourth doodle to guide 450.  Make sure they all abut against the vertical guide.  Highlight top doodle and merge down three times. Duplicate this layer, mirror, merge down.  Duplicate and free rotate to the right 90.

Open NCDNPaper_13, Image/greyscale, Adjust/Brightness and Contrast 40/20, Image/Increase color depth 8 bits. Set the foreground to pattern and select this paper, scale 10.  Use the Preset shapes tool, rectangle. Set the line style to solid and width to 30. Close the background color.  Draw a rectangle frame about the size as in the sample image, convert to raster. Highlight the vertical doodle layer and move it up until you see a portion of it above the frame, merge down. Highlight the frame layer, select all, float, defloat. Add a nice inner bevel.

Using the magic wand, click inside the frame, modify/expand 4, add new raster layer. C/P MCDNPaper_06 into selection, adjust/sharpen, select none. Drag below the frame C/P MCDN_Diamond Chain as new layer and move to the left top corner of the frame, duplicate, mirror, flip, merge down.

C/P your focus tube as a new layer in your frame.  I used the poser tube included in the kit which is ©House of Poser.  Feel free to use a tube of your choice.  Once you have it positioned where you want it, add a nice drop shadow.

Open MCDNCandle_01, resize to 20%. C/P and move to the lower left corner of the frame, duplicate and drag this second candle below the first candle, add a drop shadow to each candle.  Open MCDNChampagneFlute, resize to 18%, c/p as new layer, duplicate, position both glasses on the lower right of the image, add a drop shadow to each glass. Open MCDNChampagne, resize to 50%.  Move to the lower right of the tag by the two glasses, add a drop shadow. Open MCDNTripleLoopBow_01, resize to 40%. Adjust/Brightness and Contrast 40/20. C/P as a new layer and move it to the right top corner of the tag.

Now you can add your text.  The font I used is called Bronte.  Add your watermark and copyright information and you’re done!

Easy-peasy! Hope you enjoyed this tut.


May 10, 2010

Rockin' Divas


Rockin’ Divas

This tut was written by me, Em Jay, on 5-10-10 with all rights reserved.  Please do not copy and paste it in any group, any website, or call it your own. You can link to it using a text link to my blog.

This tut is written using a PTU kit created by KiKeKa Kits called Rock On. The stores she currently sells at are listed on her blog here.  It was written using PSPX, but is adaptable to any version and is for people with a good working knowledge of PSP.

No outside supplies needed.

Open a new image 550 by 550, fill with white, select all, add new raster layer, c/p paper05 into selection.  Effects/Artistic effects/Chrome with these settings – Flaws 1, Brightness 100, Use original color is not checked, color white. Merge down.

Add new raster layer, set the selection tool to circle and make a circle about 260 by 260 in size. Open a paper of your choice, copy and paste into selection. While still selected add a new raster layer, open another paper of your choice and copy and paste into selection, select none. Position the two circles like in the sample image, add drop shadow to both circles.

Take the presets shapes tool and set the shape to rounded rectangle. Set the foreground color to black and background color to white. While holding the shift key, draw a frame about the size as the one in the sample image, convert to raster, duplicate. Take the magic wand and click inside one of the frames, Selection/modify/expand 2; add new raster layer and c/p another paper of your choice into selection, drag the layer below the frame.  Add new raster layer, c/p another paper into selection and drag this layer below the second frame.

Click on one of the frame layers, Select all/float, defloat; flood fill with a color from your tag, Effects/3D effects/Inner bevel with these settings – Bevel 2; Width 8; Image 16, 8, -10, 12; Light – Color white; 315, 30, 60. Repeat these steps on the second frame only using a different color from your image. Add a drop shadow to both of the frames.

Add new raster layer, using the selection tool set to rectangle make a selection around 475 by 65. Open paper18, c/p into selection. Add new raster layer and c/p paper02 into selection, select none.  Position these two rectangles as shown in the sample and drag them below the rounded square layers. Click on the Warp Brush tool and use these settings – Warp Mode contract, 32, 0, 100, 25, Edge Mode background. Distort the rectangles here and there as shown in the sample. Open Barbedwire, c/p as new layer, duplicate. Resize and position these wires over the warped rectangles, add a drop shadow on each one. C/P barbedwire02 as a new layer, add a drop shadow.

Open the rockon posers 1 and 8. Using the selection tool set to square, make a selection of the head of the posers, c/p as new image. Take one of the new images and c/p it as a new layer under one of the frames and resize and position with the deform tool, duplicate and drag above the frame layer.  Take the selection tool and make a selection of the bottom portion of the new layer and delete.  It should now look like it is actually coming out of the frame with the head on top of the frame.  Repeat these steps on the second frame only using the other poser.

Let’s decorate with some of the elements.  C/P staple02 as new image, duplicate.  Using the deform tool position, resize and rotate as needed and place them on either sides of the top warped rectangle.  C/P flower04 as new image and position on the top right of the tag. Open the drums and resize to 50%, c/p as new layer and position on the bottom right of the tag. Open hwingedheart01 and resize to 40%, c/p as new layer on the middle of the big drum, add a white drop shadow 1, 1, 85, 5.00. Open guitar01, resize to 50%, c/p as new layer, position and rotate with the deform tool. C/P tag01 as new layer and drag below the two instrument layers. Open microphone01, resize to 40%, flip and c/p it on the bottom overlapping the banner. Open charm01, resize to 40%, c/p as a new layer so it looks like it’s hanging from the barbed wire. Add a black drop shadow to each of the element layers except for the winged heart.

Open music02, select some notes using the rectangle selection tool, copy and paste as new image. Highlight the left circle layer, c/p these notes as new layer, position and resize if needed with the deform tool, add a white drop shadow using the same settings as above. Highlight the bottom background layer and c/p some notes as a new layer, move to the top left of the tag, add the white drop shadow. I also added more notes to the background layer under the drums.

Now it’s time to add your text, watermark and copyright information.  If you used the posers from the kit, the copyright should read ©KiKeKa Kits. Export as a jpeg and you’re done!

Hope you enjoyed the tut!


May 08, 2010

Feeling Blue


Feeling Blue

This tut was written by me, Em Jay, on 5-8-10 with all rights reserved.  Please do not copy and paste it in any group, any website, or call it your own. You can link to it using a text link to my blog.

This tut is written using a PTU kit created by Black Widow Creations called Angel’s Cry which can be purchased here at Underground Scraps.   It was written using PSPX, but is adaptable to any version and is for people with a good working knowledge of PSP.

Supplies needed: WSL_Mask283 which can be downloaded at weescotslass creations.  The links for her masks are on the right.

I used a poser which is ©medieval creations, http://medievilcreations.blogspot.com/.  It is a ftu image which can be downloaded here.  It’s under the Medi poser tubes 2 link and called Aleera2.

Let’s get started!

Open a new image 550 by 550, fill with white, select all, add new raster layer. Open a pattern from the kit called AngelCry1, c/p into selection on your tag, select none.  Apply WSL_Mask283 and merge group.
Add new raster layer. Highlight bottom layer, select all. Highlight top new layer and c/p Paper2 into selection.  Apply the same mask again, merge group. Resize this layer down to 75%. Effects/Texture effects/Texture Canvas fine, 25%, Image – 3, 7, 0, 0; Light – Color white, 115, 50, 30. Merge down.

C/P frame6 as new layer. Resize with deform tool if needed. C/P TearDrops1 as new layer resizing with the deform tool.  Drag this layer below the circle frame. Using the eraser, erase anything that is showing outside of the circle. Open the single TearDrop1 and resize to 60%. C/P as new layer and position it over one of the drop lines. Duplicate this teardrop so that you have one for each line of drops and position them up or down on those lines as in the sample image. Once all of the drops have been placed, merge them all down until all of the individual drops and the bottom teardrops layer are all on the same layer.

Open Flower3, resize to 25%, duplicate 4 times.  Arrange the flowers along the left side of the circle frame. Add a drop shadow to each flower layer.  Highlight the top flower layer and merge down 4 times.  Open the focus tube you chose to use and resize as needed.  I used the Medievil Creations poser named Aleera11 which is described and linked above. C/P is on the bottom of the circle frame.  Add a drop shadow. C/P Bow4 as a new layer. Resize, rotate and position the bow on the lower right of the circle frame.  Add a drop shadow. Open Sparkle3, resize to 50%.  C/P as new layer and duplicate about five or six times and just position them here and there around the outside of the frame. Merge all visible.

Now is the time to add your text, watermark and copyright information.  I used a font called 1 Snappy DNA. Export as a jpeg and you’re done!

Hope you enjoyed this tutorial.

May 06, 2010

Rieka

Rieka

This tut was written by me, Em Jay, on 5-5-10 with all rights reserved.  Please do not copy and paste it in any group, on any website, or call it your own. You can link to it using a text link to my blog.

This tut is written using a PTU kit created by Rieka_Rafita called RR_HappyMother’sDay_TaggerSize which can be purchased here at Wilma4Ever Store.   It was written using PSPX, but is adaptable to any version and is for people with a good working knowledge of PSP.

I used the beautiful artwork ©hellonlegs exclusive http://simplyelegant.yuku.com/directory. Please do not use her work unless you have permission to do so.

This tag illustrates the versatility of the kit despite its name. It can be used any time of the year.  Instead of a Mother’s Day tag, I chose to make a signature tag for the designer.

Let’s get started!  Open a new image 550 by 550, fill with white. Open Button3, resize to 60%, c/p as new layer. Go to Effects/texture effects/Mosaic-Antique and use these settings Grid Settings 60, 60, symmetric is checked; Mosaic settings 60, 4, 60; click ok. Duplicate this layer two times and position and resize the layers a bit with the deform tool to make a nice mosaic flower cluster that will serve as the background for the tag.  Once you like how you have it, highlight the top duplicated layer and merge down twice.

Open Frame2, resize to 60%, c/p as new layer.  Move the frame a bit up and to the left.  I then recolored the frame slightly using Adjust/Hue and Saturation/Hue, Saturation, Lightness with these settings,
Hue -15, Saturation 20, Lightness 0; click ok. Add a nice drop shadow.  Now you can add the focus tube of your choice and position it in the frame the way you like it.

Open Lock2, resize to 30%, c/p as new layer, rotate slightly to the left with the deform tool, position up on the top right of the frame, drag the layer below the frame. Open Pearls3, resize to 50%, c/p as a new layer, using the deform tool rotate slightly to the left and resize as needed to stretch across the bottom of the frame.  Open HighHeels3, resize to 20%, c/p as a new layer, duplicate. Highlight the original shoe layer, Image/Free rotate, direction right,  degrees free 110, rotate single layer around canvas center is checked, click ok. Add a drop shadow.  Highlight the top shoe layer, add a drop shadow, merge down. Position the shoes somewhere on the lower right of the tag. Open Perfumes2, resize to 12%, c/p as a new layer and move it somewhere on the bottom of the tag, add drop shadow. Open Key2, resize to 25%, c/p as new layer, rotate to the right and position somewhere on the bottom of the frame.  Open Butterfly4, resize to 12%, c/p as new layer and move it somewhere on the side flower border of the frame, duplicate, mirror and position on the right side of the tag where you like it.

Time to add the text.  Select a darker color from the image for the foreground and a light color from the image for the background. Change the fill properties of the background to gradient and select the foreground/background gradient on the top of the dropdown list. Anti-alias smooth, stroke width 2, create as vector. Choose your font.  I used a ptu font called AL Softhearted, size 100.  Type your text, position it where you want it, convert to raster. Select all, float, defloat, Effects/3D Effects/Inner Bevel with these settings: Bevel 2, Width 6, Image – 0, 3, 0, 20, Light – Color white, 315, 40, 50. Click ok. Add a drop shadow.

Add your watermark, copyright information and export as a jpeg.  You’re done!

Hope you enjoyed this tutorial!


May 03, 2010

Lizzy


Lizzy

This tut was written by me, Em Jay, on 5-3-10 with all rights reserved.  Please do not copy and paste it in any group or call it your own. You can link to it using a text link to my blog.

This tut is written using the PTU kit created by Rieneke Designs  called Lizzy which can be purchased at Heartbeatz Store.   It was written using PSPX, but is adaptable to any version and is for people with a good working knowledge of PSP.

No outside supplies needed except for your focus tube.  Please do you use the image in the sample tag unless you have permission to do so.  It is ©Omega http://omega88.deviantart.com/.  

Open a new image 600 by 550, fill with white. Click on the preset shape tool, create as vector and anti-alias are checked, select the ellipse shape. Open papers 6 and 8.  Set your foreground to pattern and select paper 8, then set your background to pattern and select paper 6. The line style is solid and width is 20. While holding the shift key, draw a circle using the sample image as a guide as to how big it should be, convert to raster.

C/P beads1 on new layer and move it around the top left of the canvas; duplicate/mirror and move this new layer to the top right; duplicate/flip and position this third layer somewhere on the bottom of the canvas. Highlight the top beads layer and merge down twice.  They should all be on one layer.  Drag this layer under the circle layer. C/P lizzy_raster1 as new layer, duplicate four times so you have five layers of this grid. Position them using your deform tool here and there around the circle, rotating some slightly to the right and left.  Highlight the top grid layer and merge down 4 times.  Drag this layer under the circle. C/P lizzy_deco4 as new layer, duplicate one time.  Move and position these two layers one on the bottom of the canvas and one on the right side.  Merge the top deco layer down. Drag this layer below the circle.

Open lizzy_stitch2 and resize to 60%, c/p as new layer and position it on the circle, resizing if needed with the deform tool.  Duplicate and slightly resize it again to fit inside of the first stitched circle, merge down. Add a drop shadow using these settings: 1,1,90, 1.00 color white. Add the same exact drop shadow a second time. Merge down. Highlight the circle layer and add a drop shadow, 2,2,80,5.00. Close the bottom white layer and merge visible.

You can add the focus tube you chose to work with now somewhere on the circle so you can start decorating the top layers of your tag.  This is how I did mine. Open ribbon1 and 2, resize to 60%. C/P as new layers, using deform tool to rotate and position each layer how you want it. Open rose2, resize to 50%, c/p as new layer, duplicate and position both flowers somewhere on the lower right. Open rose1, resize to 10%, c/p as new layer and position somewhere on top of the first two roses.  Feel free to duplicate this small rose as many times as you want and position where you want. Open string4, resize to 60%, c/p as new layer and position on the left side of the circle. I used the eraser tool, size set to 3 to erase a few areas of this heart doodle where the ribbon was to make it look like the ribbon was weaving over the doodle. Open butterfly1 and 2, resize to 60%, c/p as new layers, position/resize/rotate the way you like them. Now highlight each element layer and add a nice drop shadow.  Once you’ve done that, merge visible.

Crop all excess white from around the tag.  Then I resized my tag to no larger than 550 on the longest side just because I prefer a little bit smaller tag. Now is the time to add your text. Choose a font you like.  I used a font called Swingdancer. Set the foreground color to a purple from your image and the background to pattern and use paper8, width set to 2. Type your text, add a nice drop shadow.  Now add your watermark and copyright information and you’re done.

I hope you enjoyed this tutorial!